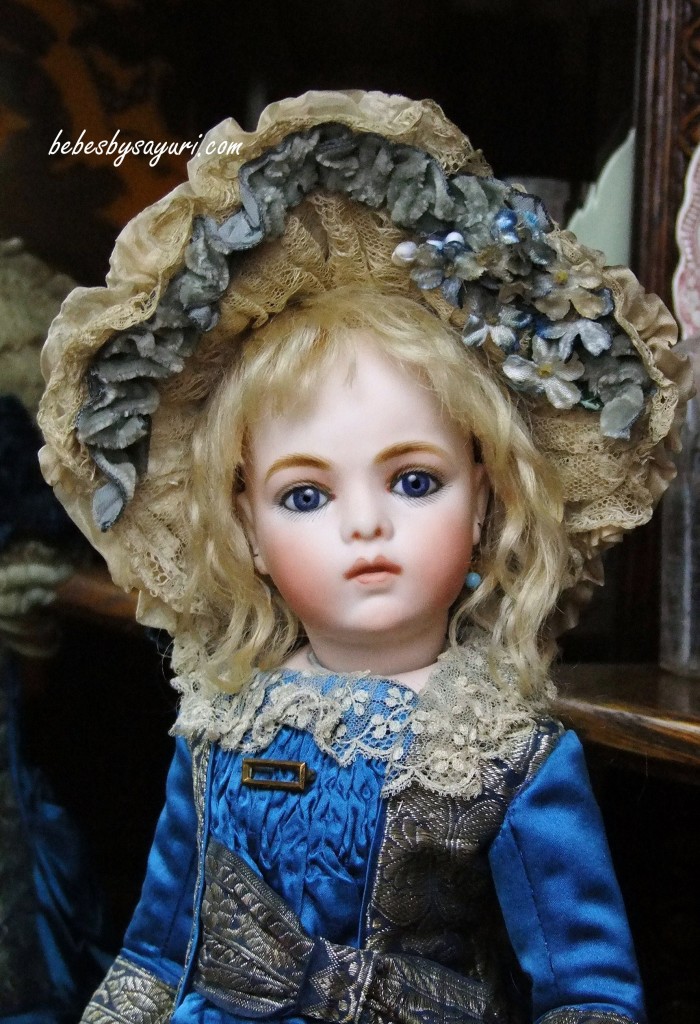
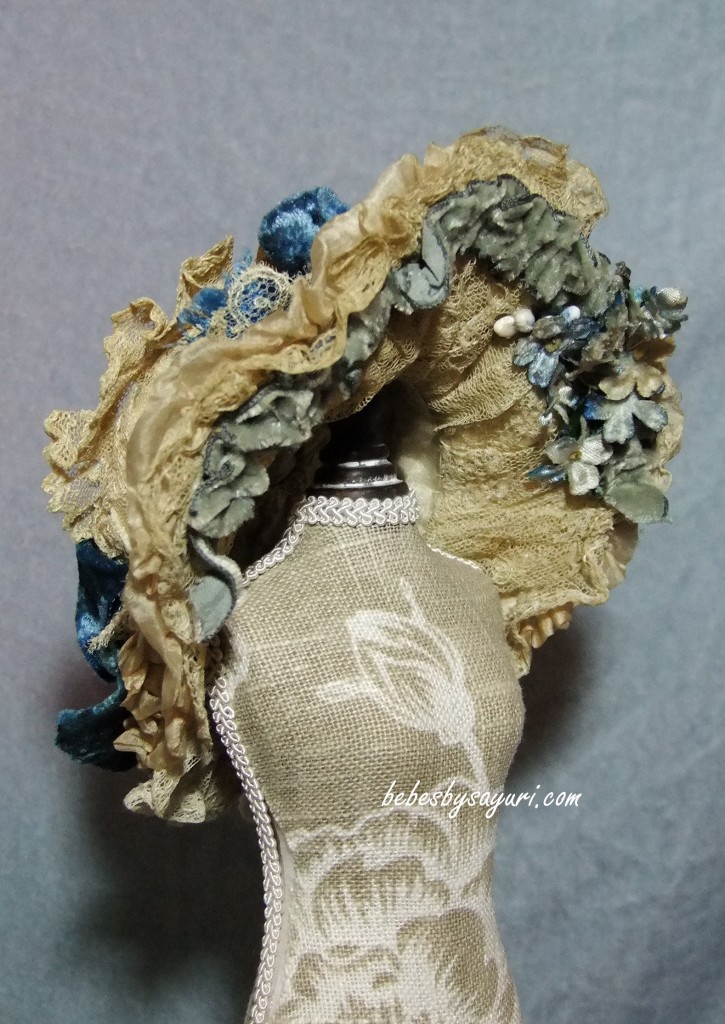
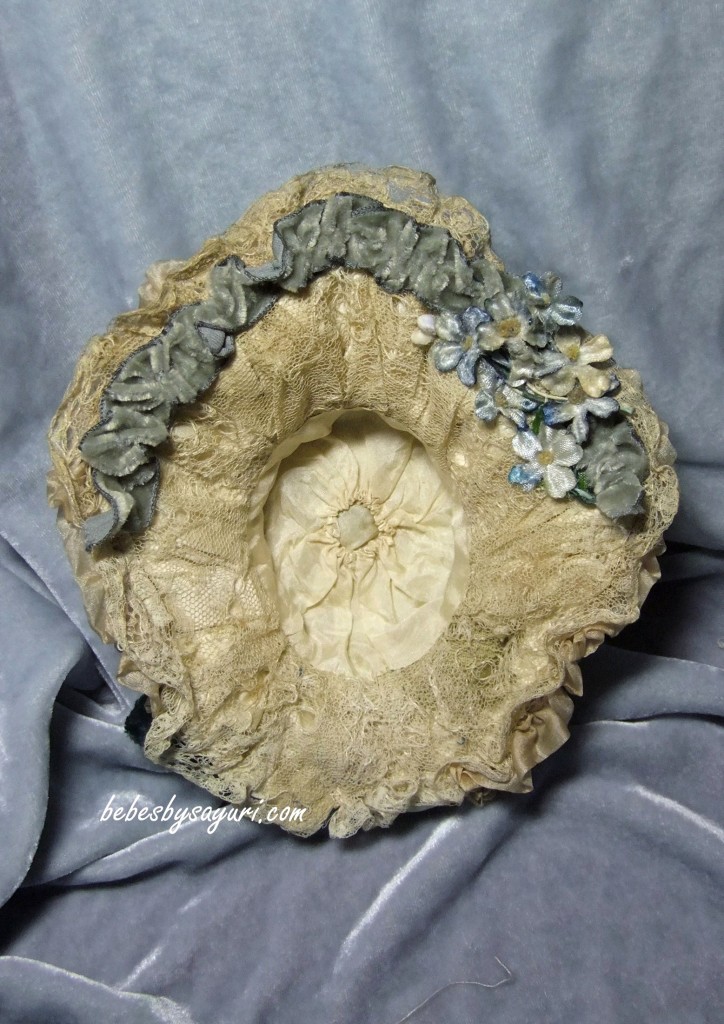
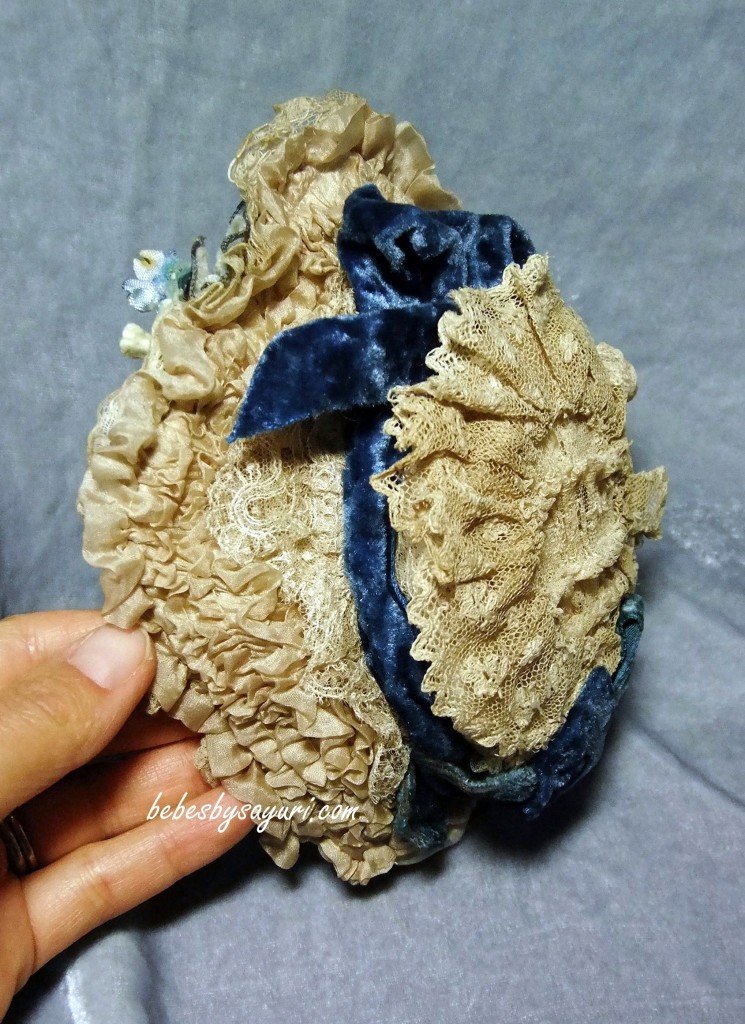
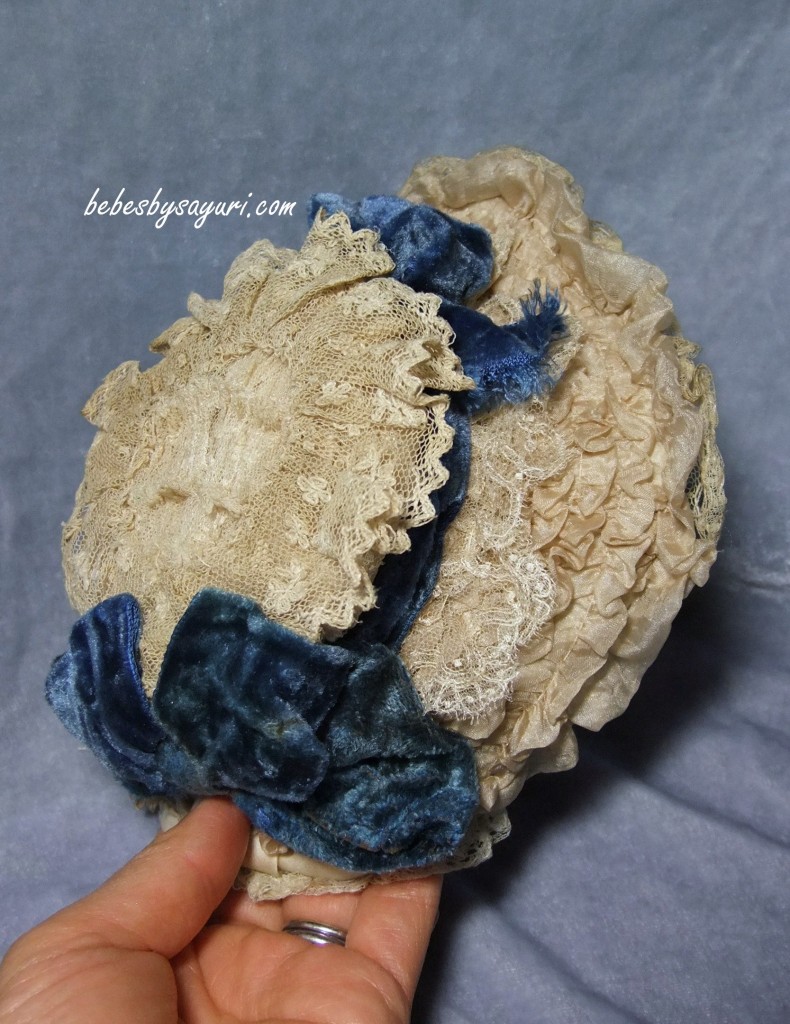
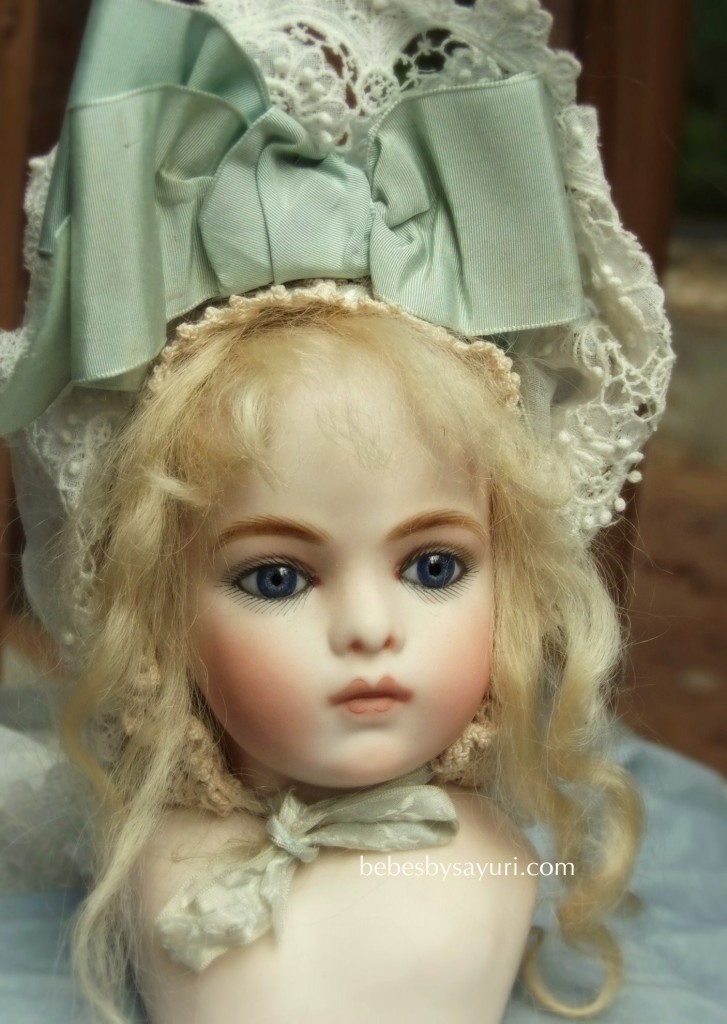
Teaser photo of 14 inch Bru Jne 4 by Sayuri

I was going to reveal her complete look today but I didn’t have enough time to finish photo shooting. I will post her photos this coming Thursday. I apologize to people who emailed me how much they are looking forward to today’s revealing. I will also get back to all of your emails before Thursday. I can post one photo today to give you some ideas. Hope you like her!

今日Bru 嬢のお披露目をする予定でしたが、時間が足りなくて写真撮影を全部済ませることが出来ませんでした。今週の木曜日には画像を掲載できると思います。今日を楽しみにされていた方々、メールを下さった方々、申し訳ありません。お返事のほうも木曜日までにいたしますので、もう少しお待ちくださいね。とりあえず今日は、一枚だけ画像を載せます。

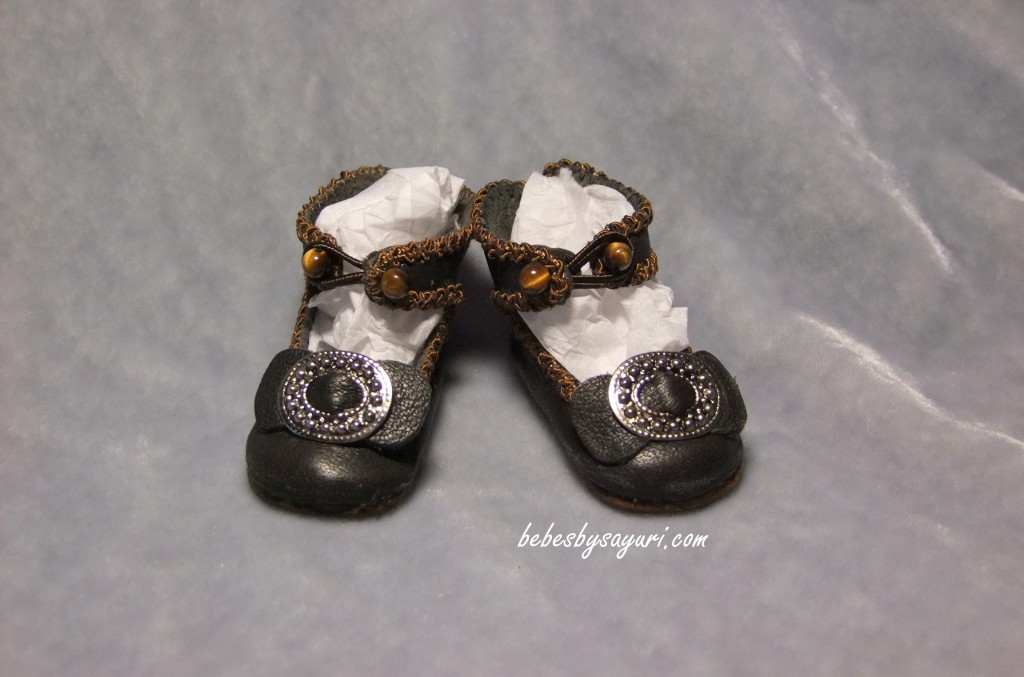
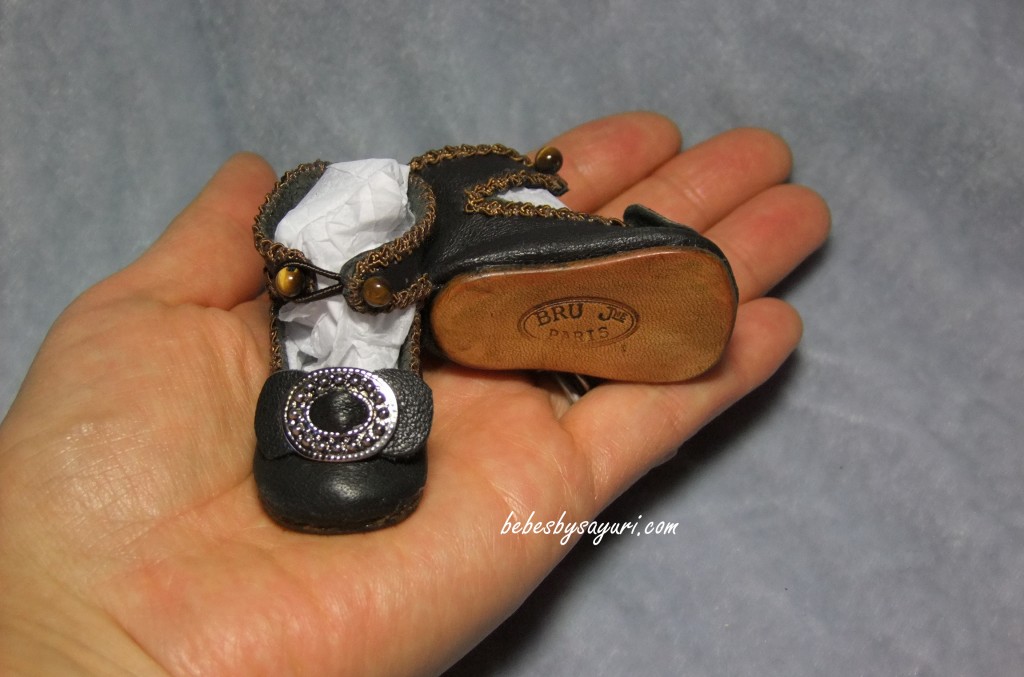
Bru shoes

I made shoes for my 14 inch Bru Jne 4 today. Nothing fancy, just simple classic Bru style leather shoes with silver buckle. Next project is to make her corset and under garment, then she will be completed. I am hoping to reveal her this Sunday!

今日はBru嬢の靴を作りました。特に特別なものではなく、いつもの定番のBruシューズです。黒の革製で、シルバーのバックルがついています。あとはコルセットと下着を作れば完成です。できれば日曜日にはお披露目出来るといいのですが。。。

Bru hat completed

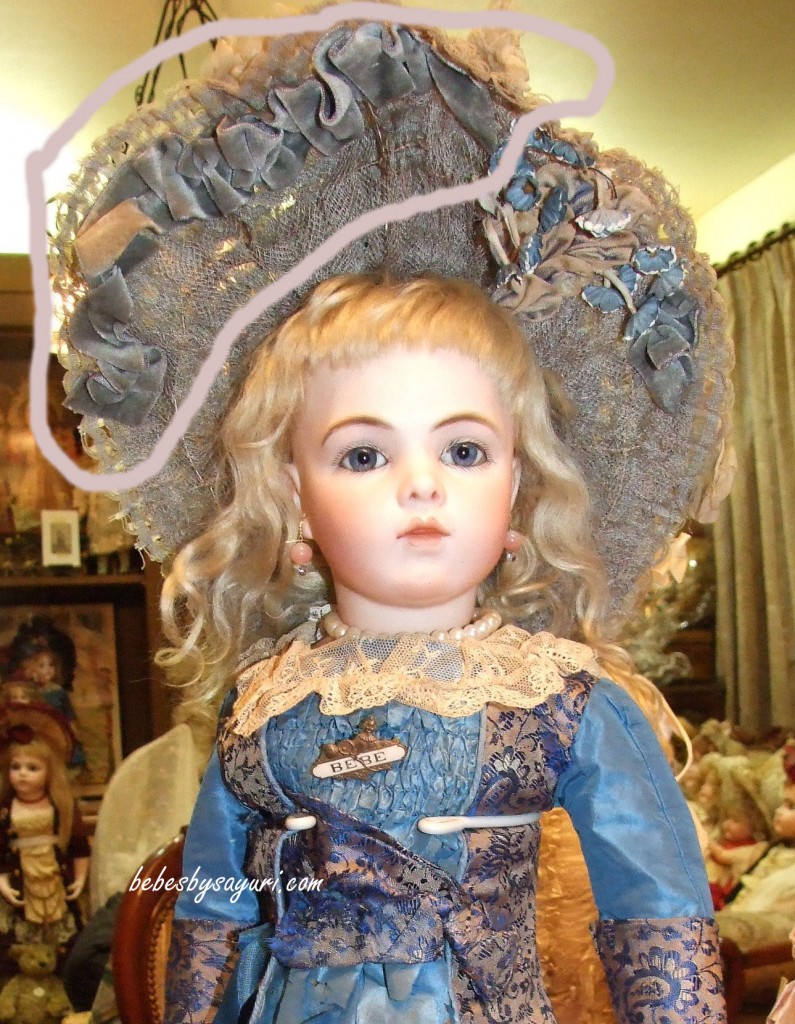
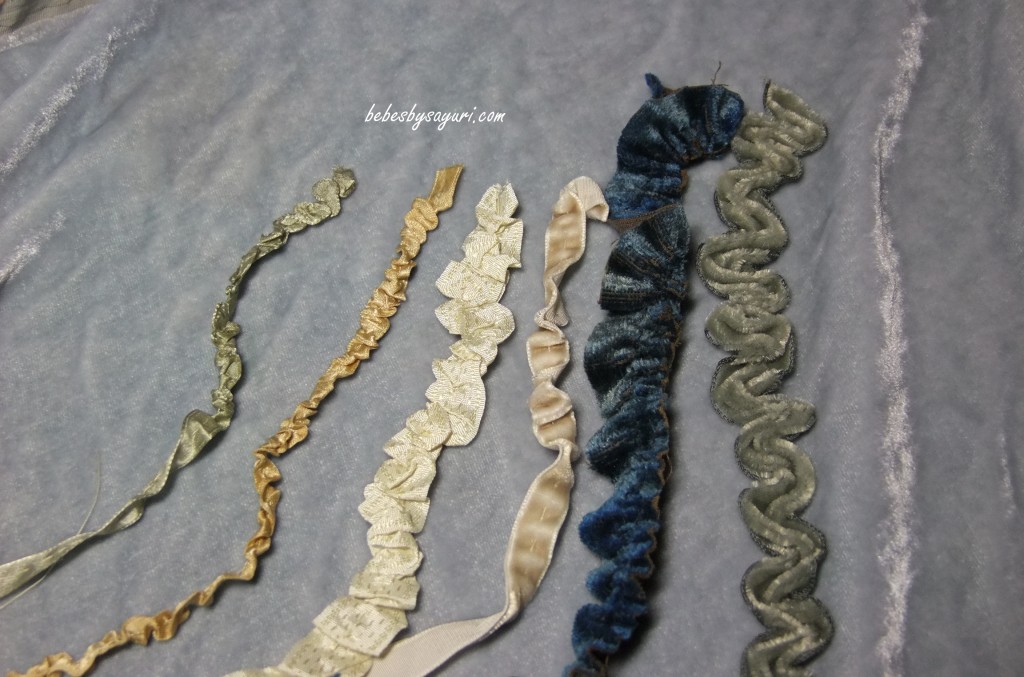
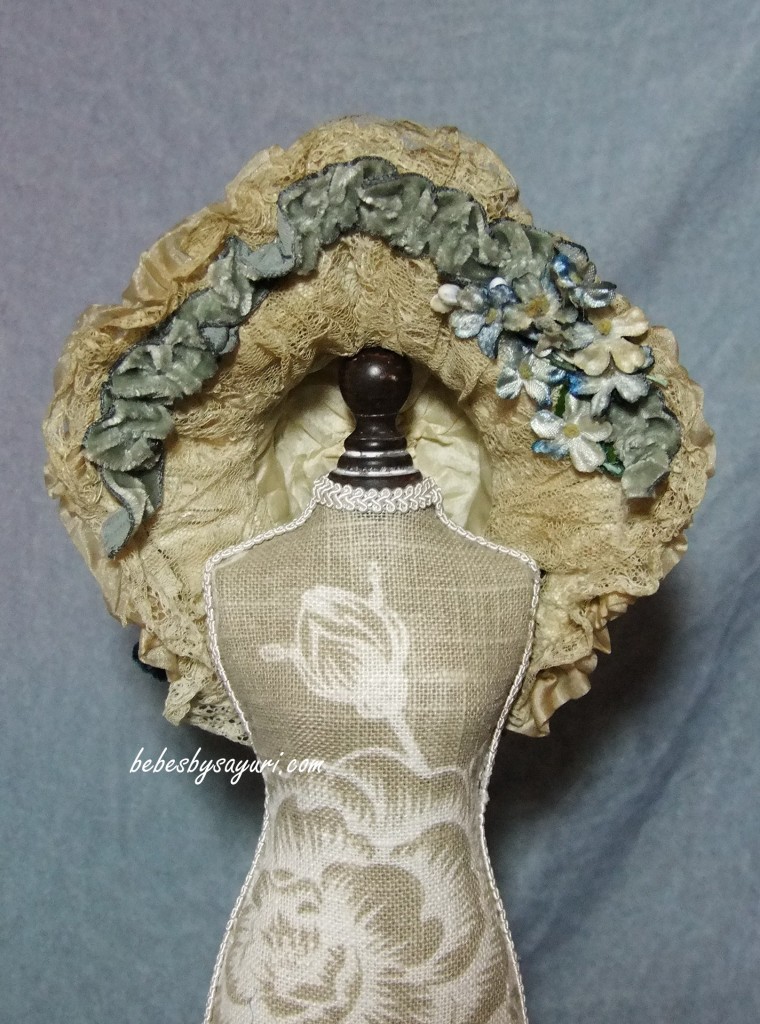
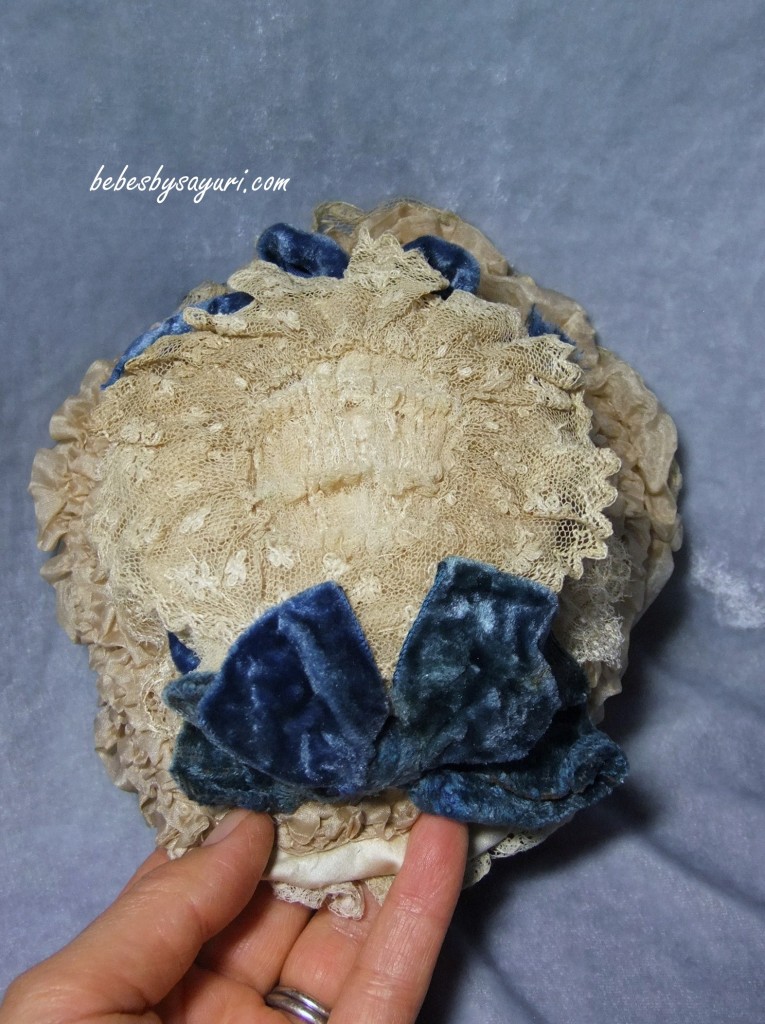
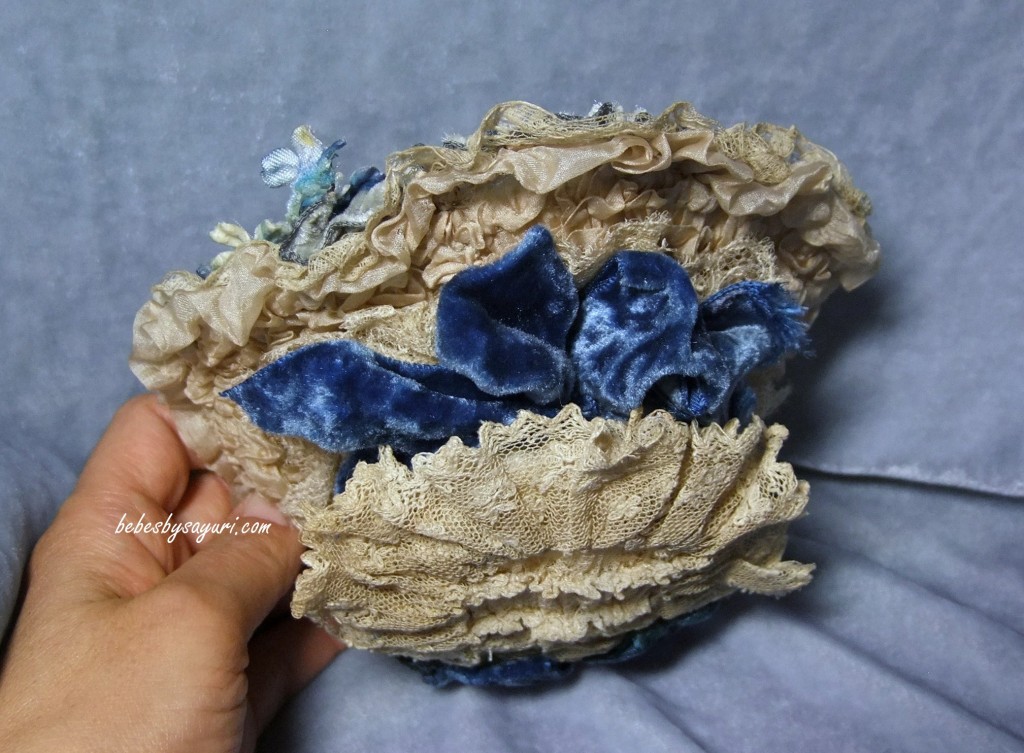
Hat making doesn’t usually take too long for me. I usually plan for a day or two depends of the size and design. But this hat took about four days to finish. The original antique Bru hat uses straw hat as base but instead, I made frame with millinery wires. Figuring out the right size of brim was also tricky. This hat looks so beautiful and grand because of the large brim. But if I make the brim too large, the doll will look silly. I finally came up with the right size brim for my 14 inch Bru after adjusting the pattern multiple times. The back side of the hat also has many layers of lace and fabrics to give depth and richness and making each parts were time consuming. I also struggled to figure out how to place ribbon at front part of the brim. ( please refer to the photo below ) Placing ribbon in this fashion seem nothing to it but when I tried, it looked so goofy. I ended up with making few different color and style of accent ribbons to see which one works the best. If none of them looked right, I was going to not to add ribbon in front. But I finally figure it out today and it seem okay, I think, I hope. Here are photos of the hat I finished today.

ボネットを作る時は、いつもは大体一日二日で完成できるのですが、このボネットには苦労しました。オリジナルのBru嬢のボネはベースがストローハットなのですが、それが作れないので代わりにワイヤーで形を作りました。そして、ツバのサイズにもちょっとてこずりました。このボネの素晴らしいところは、やはりあのツバのサイズですよね。かといって、大きすぎるとバランスが悪くなってしまうので、私の14インチの小さい娘に合うようなツバのサイズを見つけるために型紙を何回か調節して、なんとかバランスの取れるつばの形が出来ました。正面から見えない帽子の後ろ部分にもパーツ作りに時間をかけ、ギャザーされたシフォンやレースを重ねて、厚みと深みが出るように仕上げています。でも一番苦労したのは、ツバの正面部分につけるリボンの飾りです。アンテイークのBru嬢の画像を見ると、リボンが何気なくつけてあってとても素的に見えます。これを実際にまねてみたら、リボンだけ浮いてしまって色のバランスが狂ってしまいました。ブルーにこだわらず、ボネのレースとのバランスが取れる色やサイズの違うリボンをいろいろ試してみましたが、しっくりなじむリボンがなかなか見つからず、あれこれ迷っているうちに今日までかかってしまいました。やっと見つけた色が合うこのリボンも、ギャザーの寄せ方によって浮いてしまったりと、けっきょく丸一日試行錯誤するはめに。とりあえず、今夜一応形になったので、画像を載せたいと思います。

************************************************************************************************

This ribbon at the front was extremely hard to duplicate.               このフロント部分のリボンのつけ方がとても難しかったです。

I tried with many different ribbons…                                                                                          試したリボンの数々。。。

Here is my version of Bru hat.                          完成品はこんな感じに出来上がりました。


Bru dress completed!

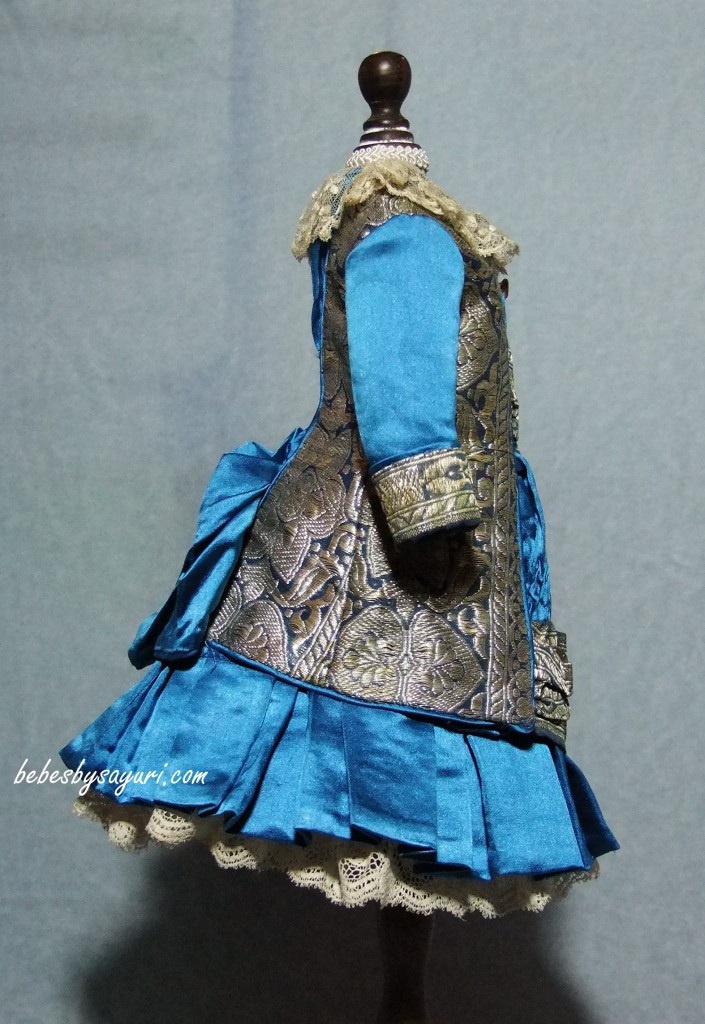
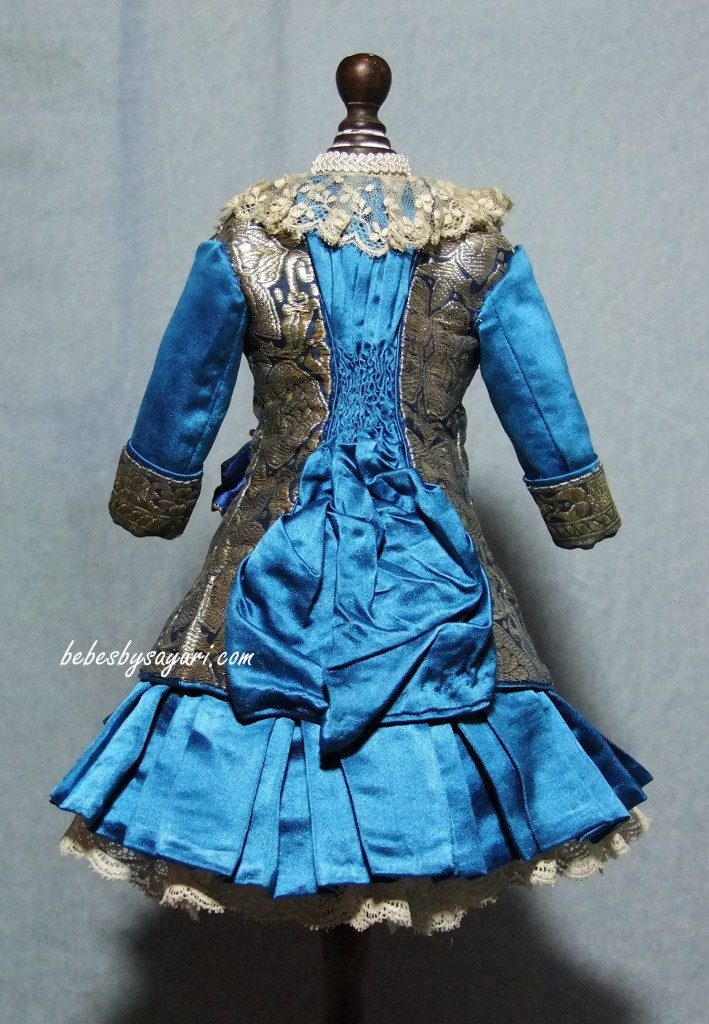
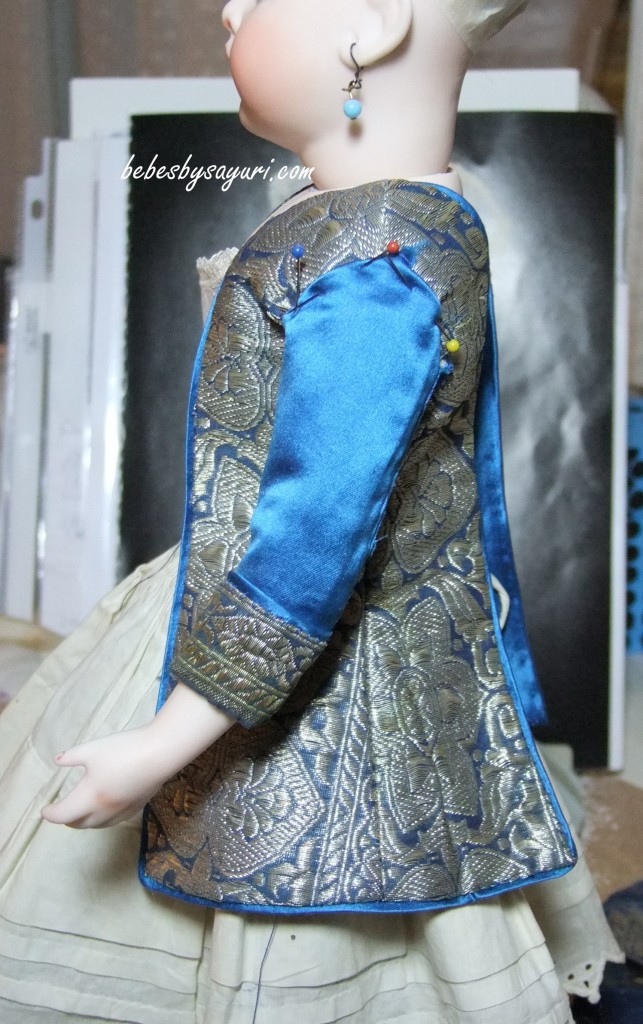
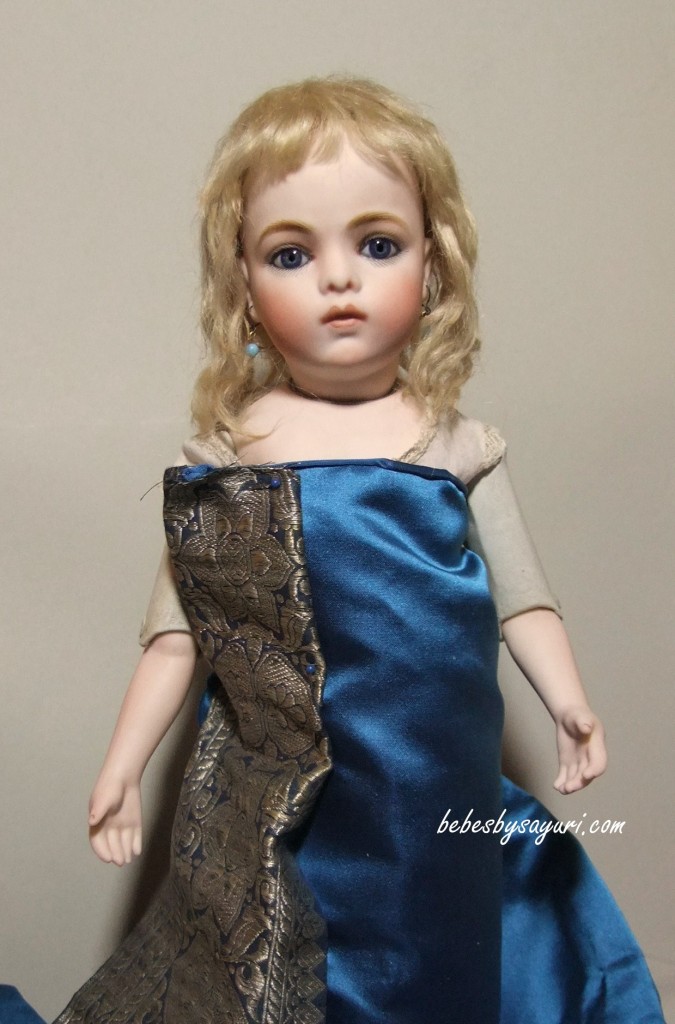
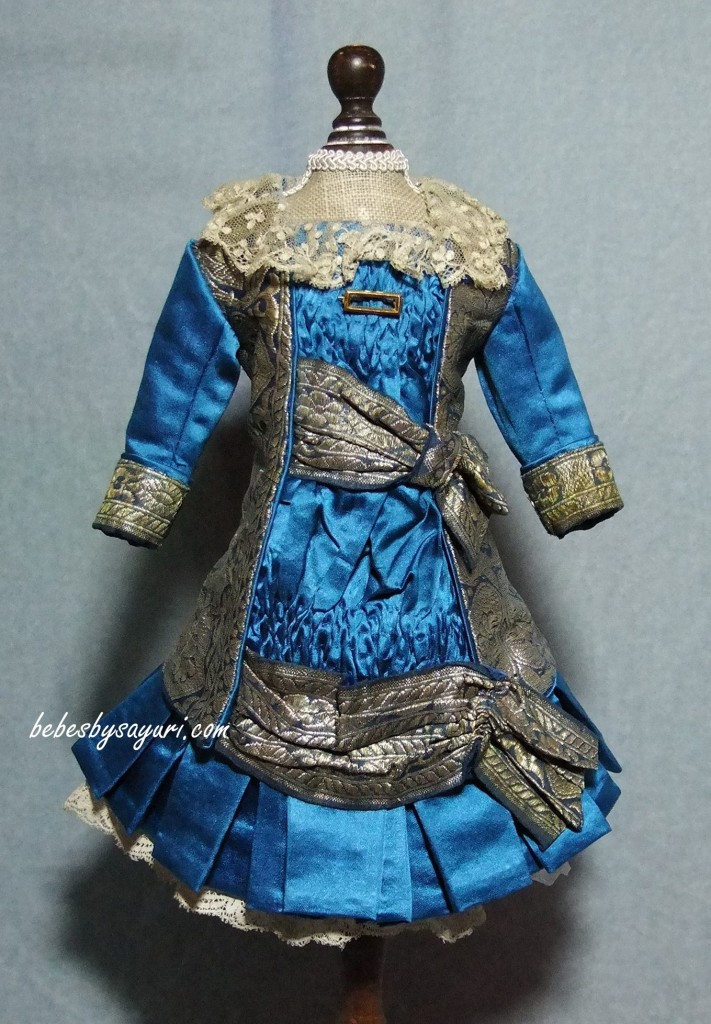
My reproduction of antique Bru dress is completed today!!  Making recreation of antique dress like this one is a huge challenge because I have to pay extra attention to detail try not to loose integrity of original dress.  I actually regretted little bit for choosing this design because the pressure was little too much. But I am happy with the result and I am ready to show my work to everyone!

Bru嬢のドレスが完成しました! 実はこのデザインを選んでからちょっと後悔しました。なんだか無謀なチャレンジを選んでしまったようで。。。こんなに有名なドレスのレプリカを作るからには、オリジナルの風合いを損なわないようにいつもの倍くらい気を使って作らなければなりません。プレッシャーが大きすぎてちょっとスランプになってしまいましたが、なんとか今日完成までこぎつけました。出来はまあまあ満足のいくものなので、ここでご紹介したいと思います。
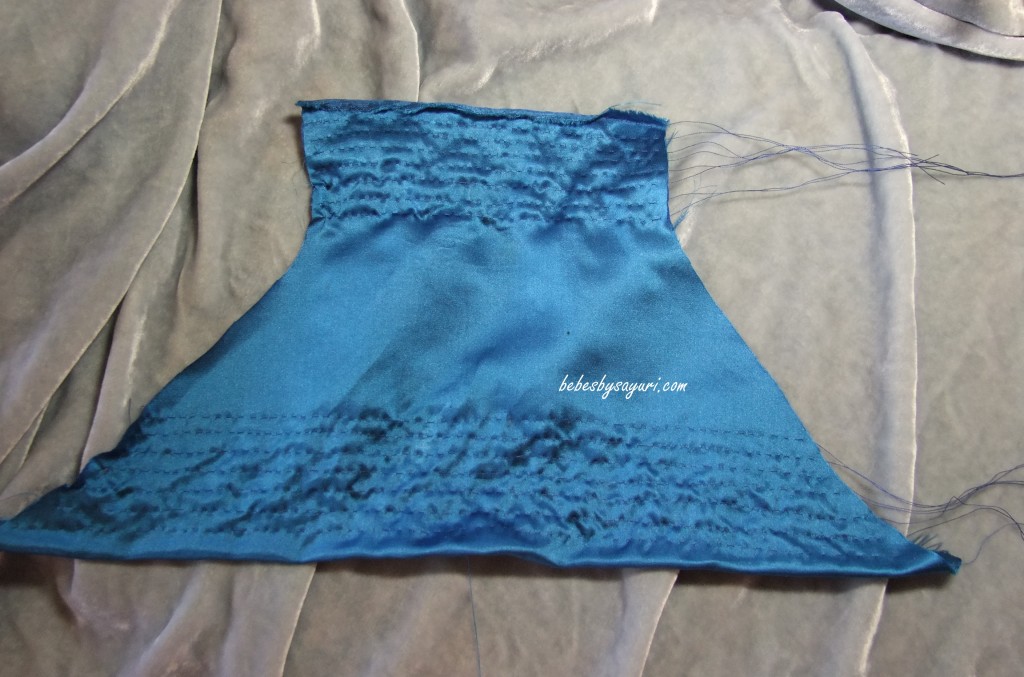
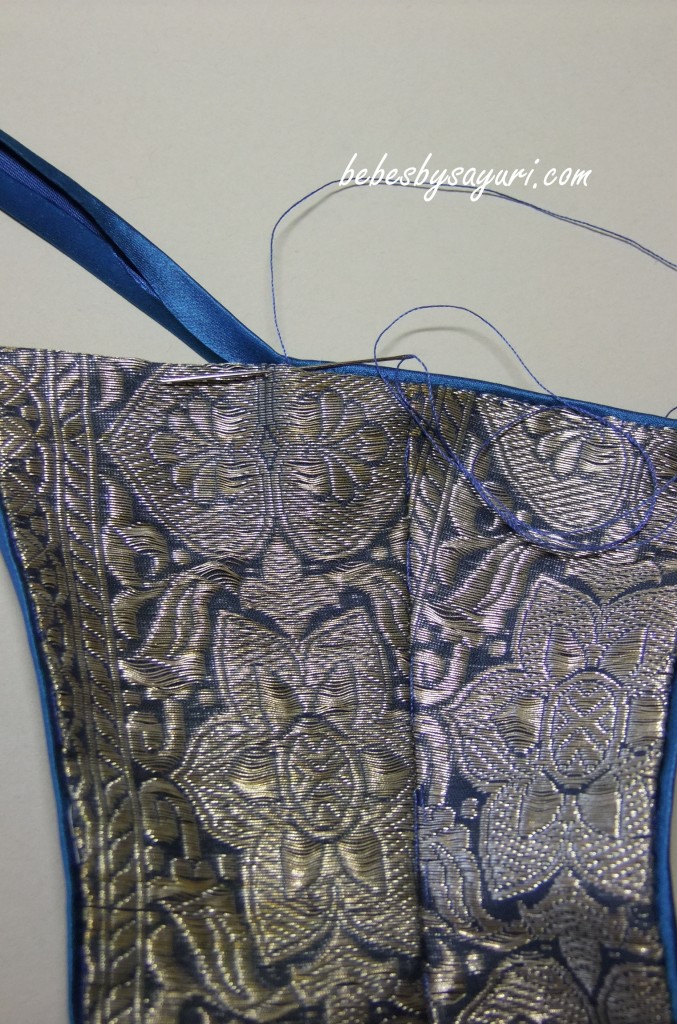
I stated making front panel ( plastron) by hand stitching many lines.                                    まずは前回の続きから。フロントパネルの制作。ひたすらちくちく雑巾縫いをします。
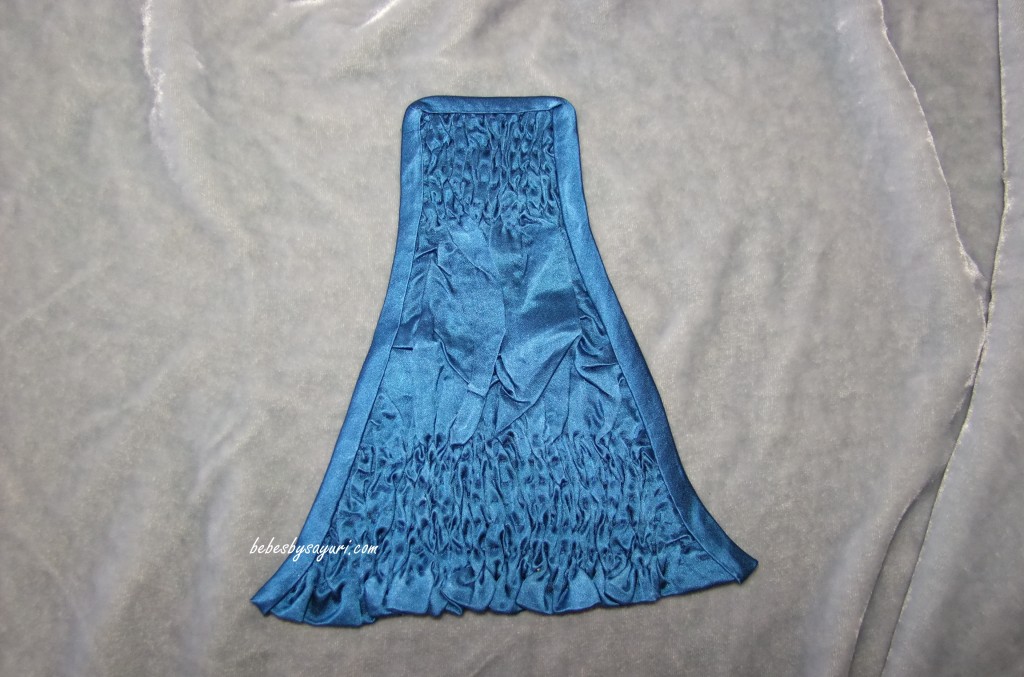
Pull all strings to create gather then press with iron to make nice wrinkles.       横糸をひっぱってギャザーを作り、アイロンで綺麗なシワを作ります。
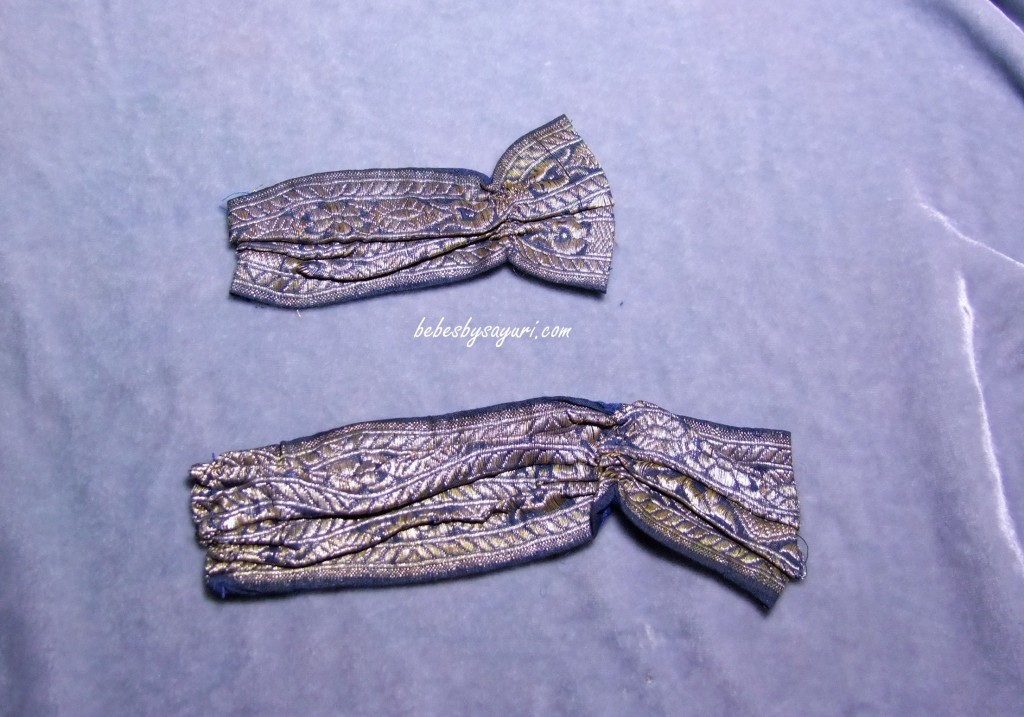
The two belts at the front panel are very important part or this dress design. I ironed them carefully to create right ” wrinkles”.                                                                                         このドレスの魅力の一つは、フロントパネル部分の”帯”のようなベルトだと思います。ここでも”シワ”を魅力的に見えるよう気を使ってプレスしました。
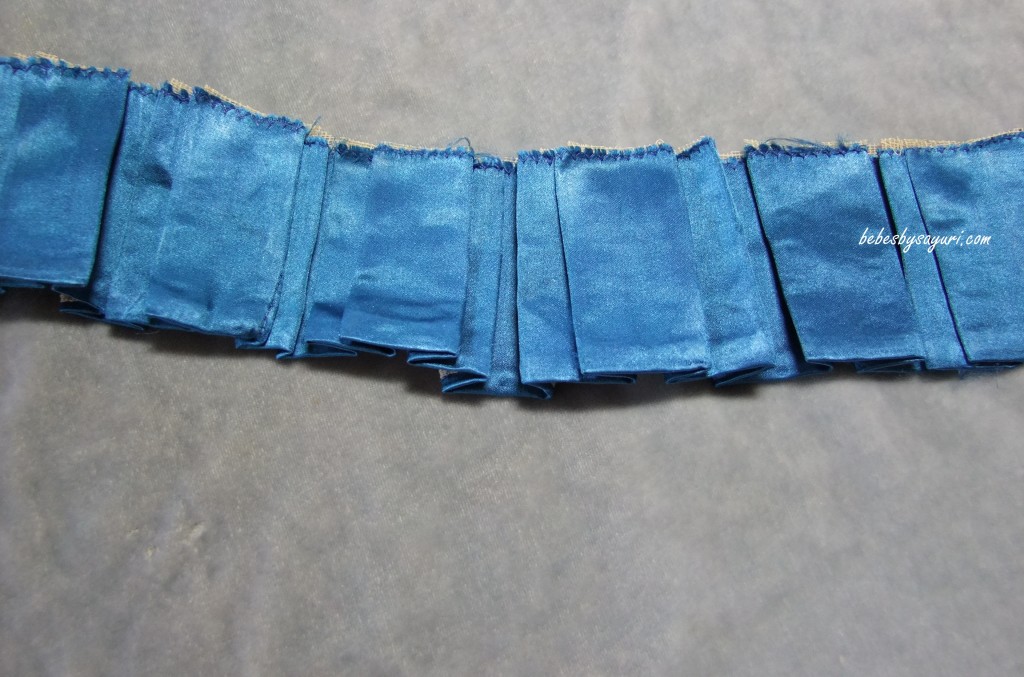
The original Bru dress uses unique box pleats design for the skirt part. It might be a small detail but this kind of extra work gives dress a spacial look. I didn’t have enough patterned fabric left to make skirt part so I used blue fabric instead.

オリジナルのドレスはスカートの部分に二重のボックスプリーツを使っています。こういう細かい部分に変わったデザインを取り入れることで、ドレスの出来上がりに違いが出ます。ジャケット部分に使った柄入りの生地がスカートを作るほど残っていなかったので、ブルーの生地で代用しました。

*************************************************************************************************

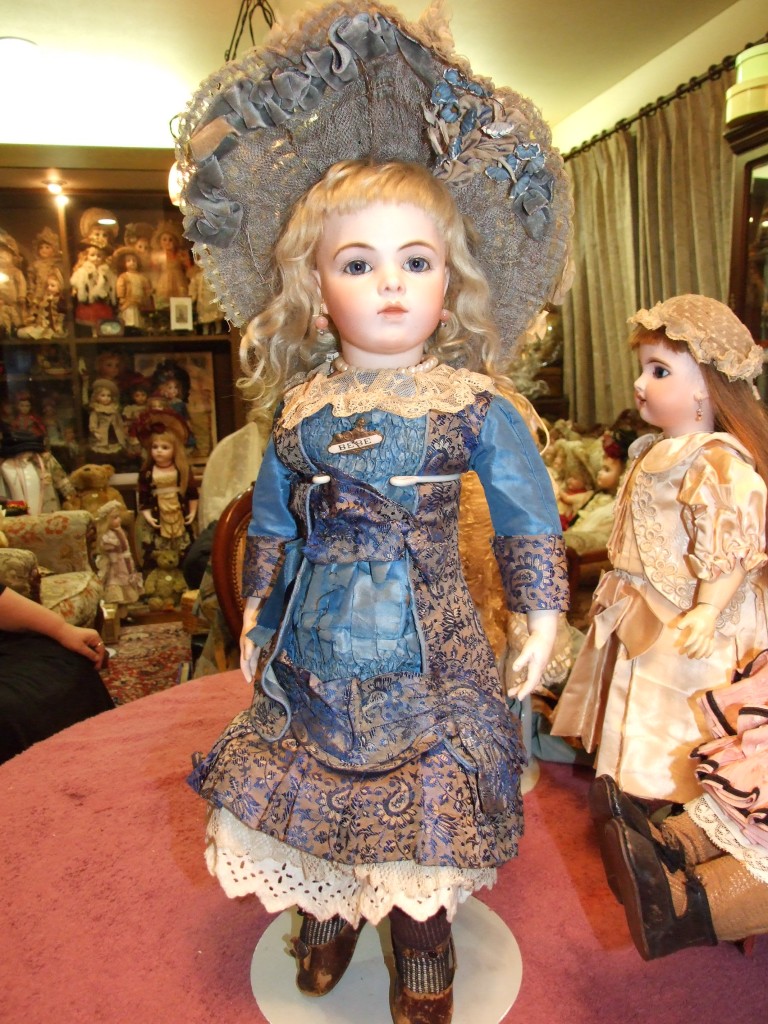
Here are photos of finished dress.
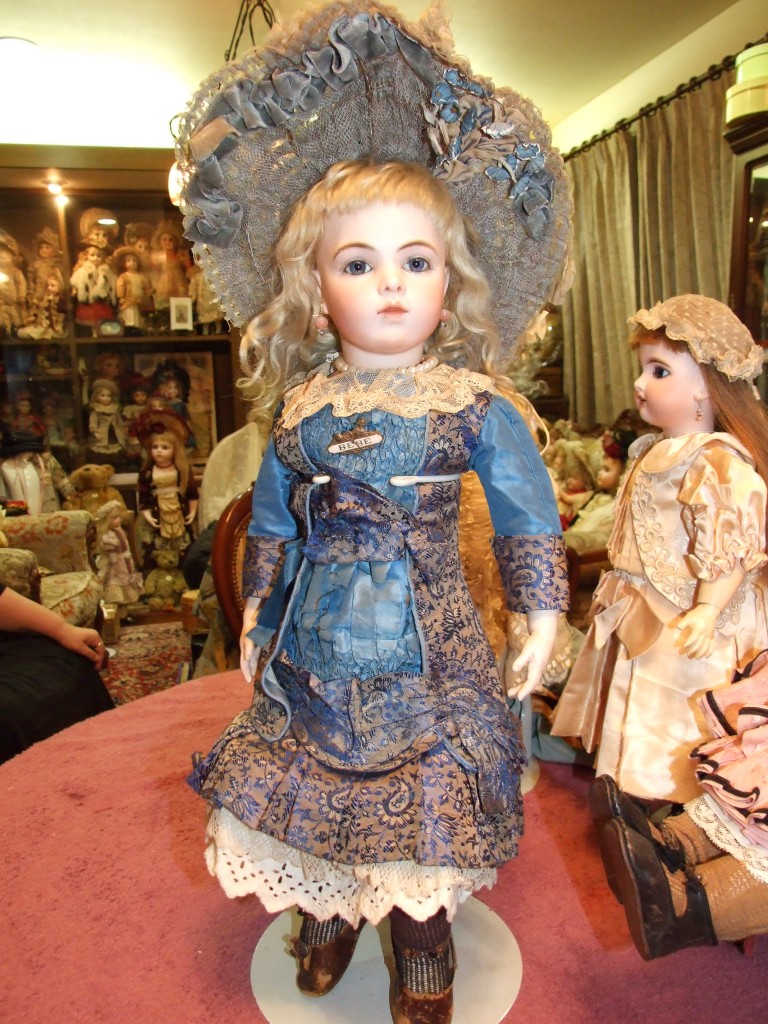
This is the original Bru doll owned by Mr. and Mrs. Yamazaki.
Bru dress in progress

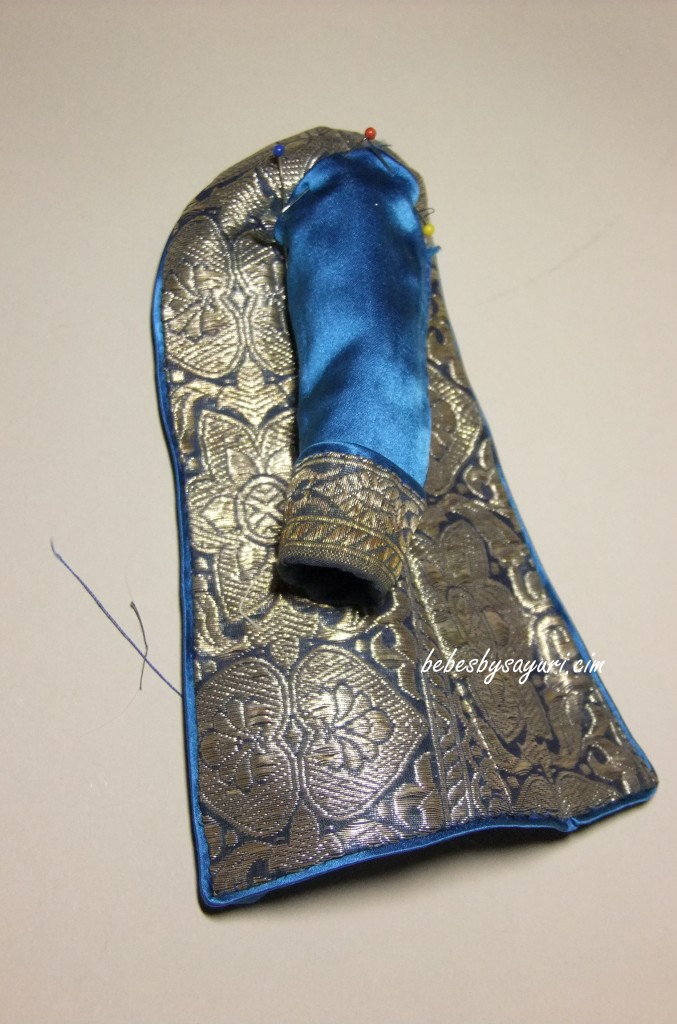
It’s a slow progress but I have made this much so far. The patterned fabric is made from silver thread and it’s very heavy. Feels almost like working with kimono belt. Hand stitching piping trim caused me bad neck pain and I had to stop. Hope I can finish up front and back panel next week.

大した進歩ではありませんが、とりあえずジャケット部分のみごろまで作りました。手に入れたアンテイークの柄入りの生地は、銀糸で織ってあるのでなかなか重量感があります。なんだか着物の帯のような。パイピングのトリムを縫っていたら、首の痛みが激しくなったので、今週はここまでで止めました。来週は前と後ろのパネル部分を完成できればいいなと思っています。


Fabric for the Bru dress

Patterned antique silk fabric I found online for the Bru dress finally came today. I hope this will work …

先日ネットで見つけた柄入りのアンテイークシルク地が、今日やっと届きました。雰囲気的にはいい感じですが、果たして出来上がりはどうなるでしょうか???

Bru body completed

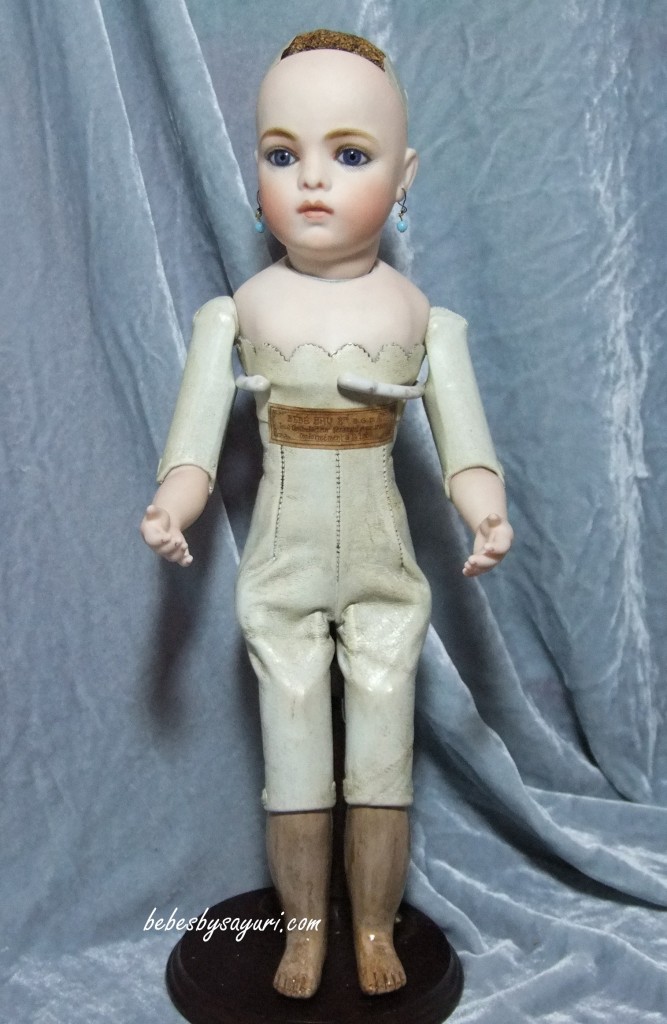
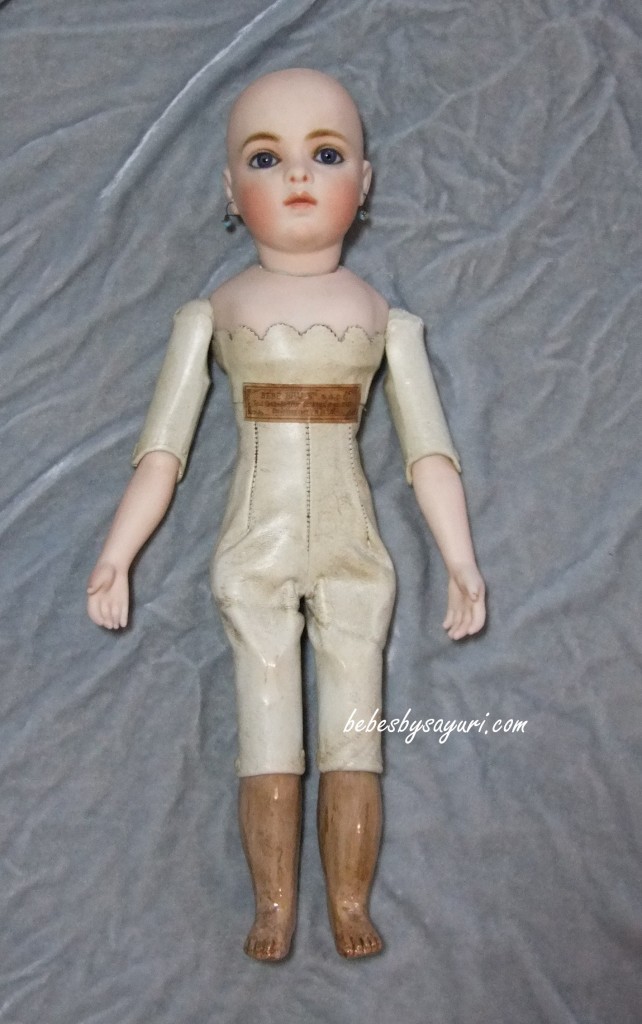
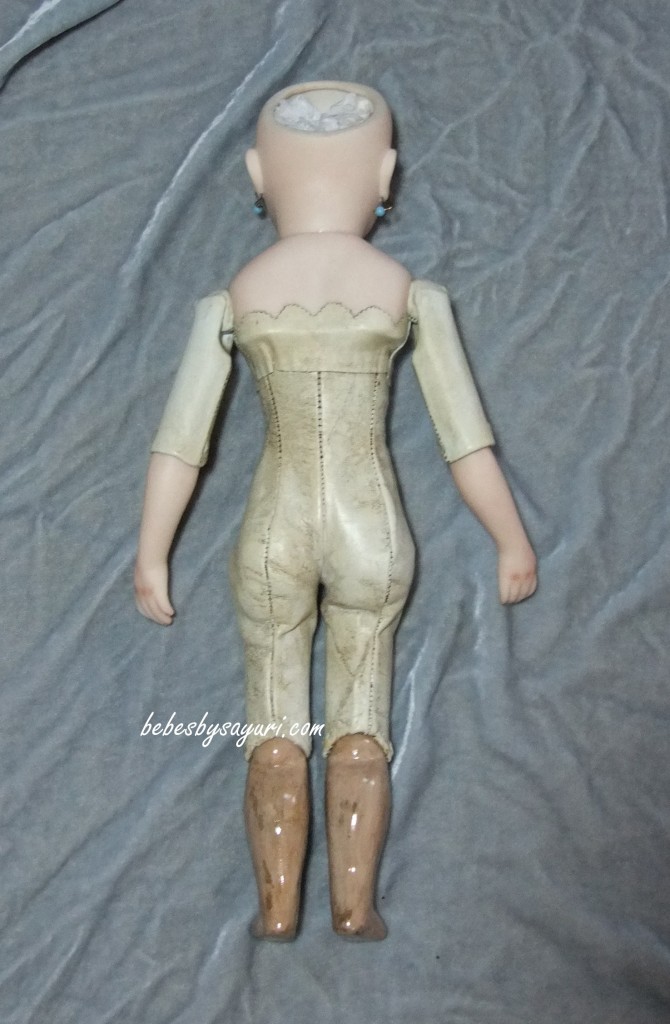
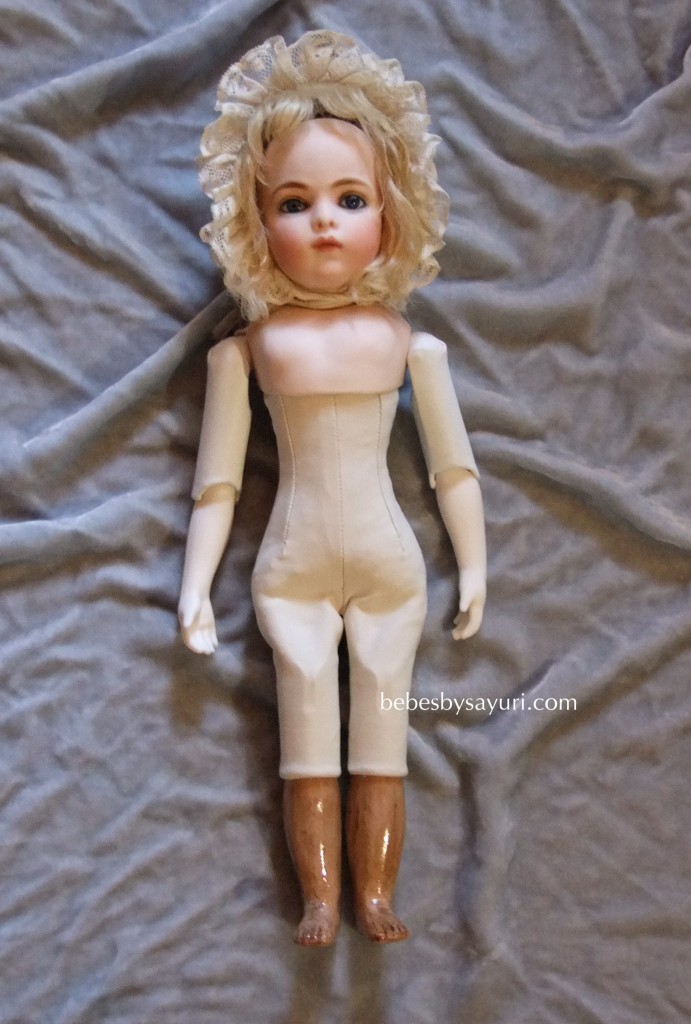
I antiqued leather section of the body and assembled head and body together. My kiln has brand new elements now and I can bisque fire in no time. It’s so wonderful !                     Here are photos of 14 inch Bru Jne 4 with Chevrot style body.

ボデイーの革の部分を古い感じに染めました。キルンもニクロム線が新しくなって以来、焼成があっという間に出来てすごく嬉いです。おかげでビスクアームも出来上がったので、これでボデイが完成しました。

Next is dress making!!   I recently had few requests of recreating that famous Yamazaki Bru in blue dress. I am sure many of you recognize her from photo or form the book. She was a cover girl of “Rokusho” magazine published in Japan. I also had an opportunity to see her in person when I visited Palmira Yamazaki back in 2009. This doll is so much more prettier than pictures and her striking blue dress is just unforgettable.

さて次はいよいよドレス制作です。実は最近、あの有名な山崎コレクションの青いドレスのBru嬢を作って欲しいと言うリクエストを何件かいただきました。多くの皆さんは”緑青”のカバーガールのこのBru嬢をご存知かと思います。私も5年ほど前に山崎さんのお宅へ訪れた際に、このBru嬢を拝見する機会に恵まれました。実物は写真で見るより何倍も美しく、このドレスはあまりにも有名ですよね。

Palmira was generous enough to give me a permission to use the design of this blue dress and hat and I am thinking to make the same dress for my little Bru. However, my Bru has different face than Yamazaki Bru so it’s not going to be a recreation of this famous doll. I will be using the same dress design to give similar look to my 14 inch Bru.    I have blue antique silk but paisley pattern blue silk is extremely difficult to find. ( I have been searching for quite long time but no luck so far) I am hoping to find something similar very soon. Wish me luck!

この有名なドレスのデザインをお借りするお願いをしたところ、パルミラさんは快く承諾してくださいました。なので、今製作中の14インチのBru嬢に、このドレスと同じデザインの物を作ってあげたいと思います。ただし、私のBruは山崎Bruとはお顔が違うので、お人形自体のレプリカと言うわけではありません。今回ドレスのデザインをお借りして、似たような雰囲気の作品を作り上げる、ということになります。私はブルーのアンテイークシルク地は持っているのですが、ペイズリー柄のアンテイーク地は見つけるのがとても困難です。しばらく探していますが、まだお目にかかっていません。なので、似たような生地が見つかればいいなと思っています。

Bru body progress

I have made Bru Chevrot style body this much so far. My kiln is out for repair right now so her lower bisque arms are not being painted yet. I am going to stain the leather part in next stage to give a vintage look. Body making is time consuming and not as exciting as making dress. 🙁    I just can’t wait to get on next phase to start her dress!

シェブロースタイルのボデイーは、ここまで出来上がりました。先日焼成釜を修理に出したので、ビスクアームの絵付けは中断しています。次は革の部分にアンテイーク加工を施して、ビンテージの雰囲気を出します。ボデイー制作は手間がかかる上、ドレス作りほど楽しくないのでちょっとテンションが下がります。早くボデイーを完成させて、ドレスの制作に取り掛かりたいです。


Making legs for 14 inch Bru

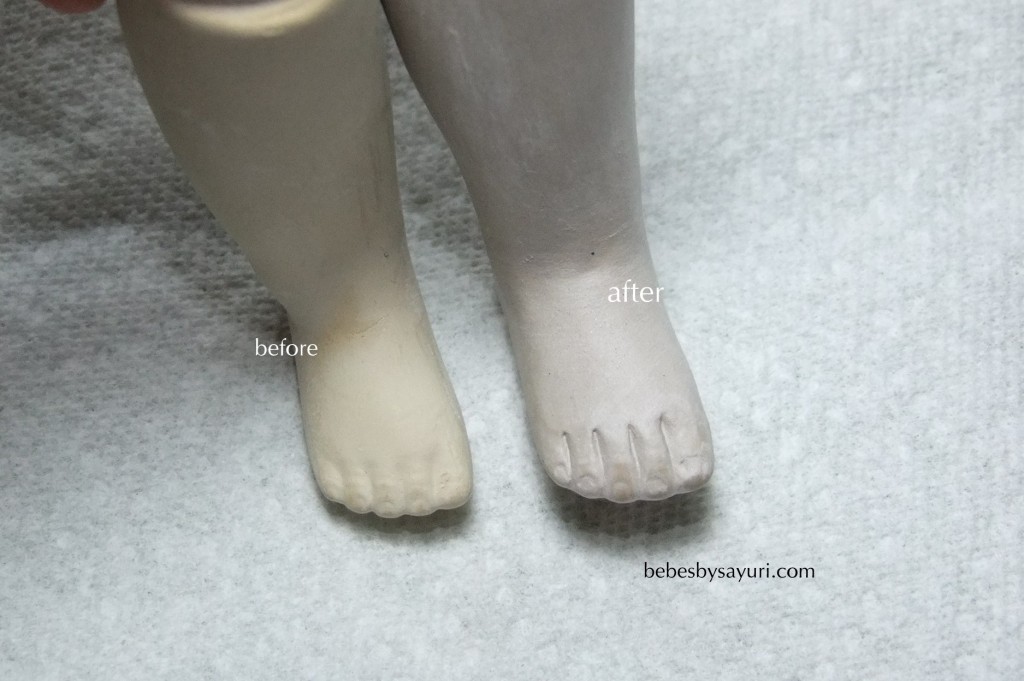
I use to make lower lags in much simpler process. Cast legs in mold and dry, sand them and cure in the oven. Paint legs and they were done! But ever since I restored antique Chevrot body especially foot area, I am no longer satisfied with my old method. I want to make composition legs look more authentic. So I spent extra time with my new 14 inch Bru leg to experiment how much I can do to make molded legs look more authentic.

今までは、シェブローボデイーの下肢の部分を作るのは比較的簡単で、型抜きをして磨き、オーブンで焼いたら色を塗って完成、でした。ところが前回アンテイークのシェブローボデイー、とくに足の部分の修理をして以来、今までのやり方では物足りなくなってしまいました。従来のモールドの足を使って、どれだけアンテイークのBruの下肢に近づくことが出来るか、今作っている14インチのBruレッグで試してみました。

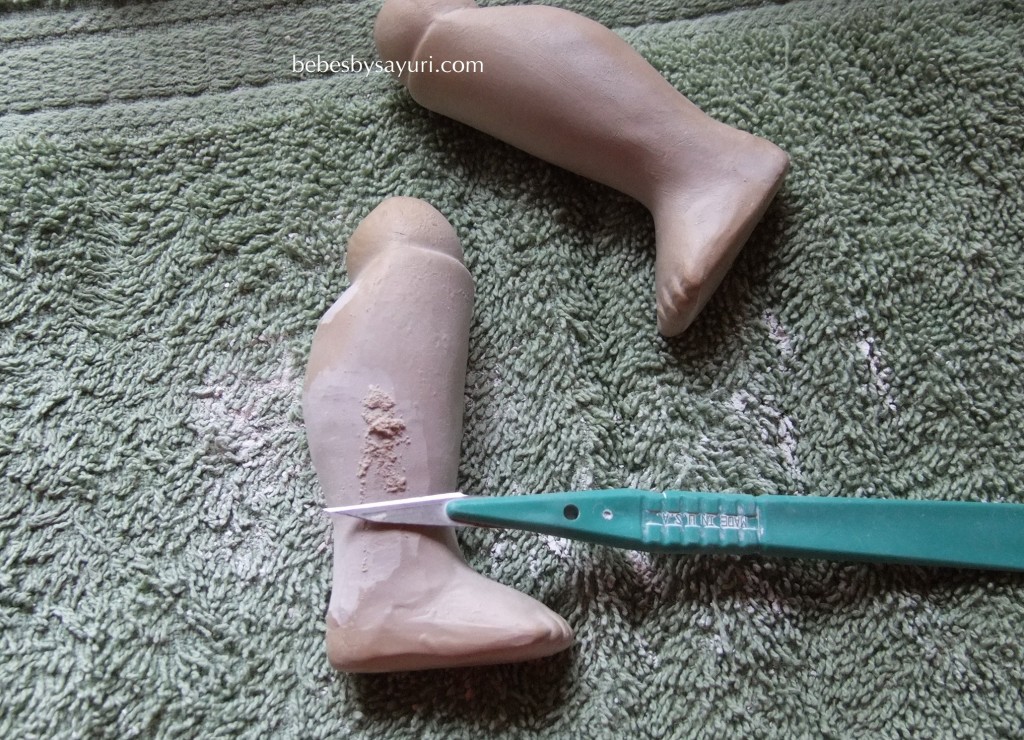
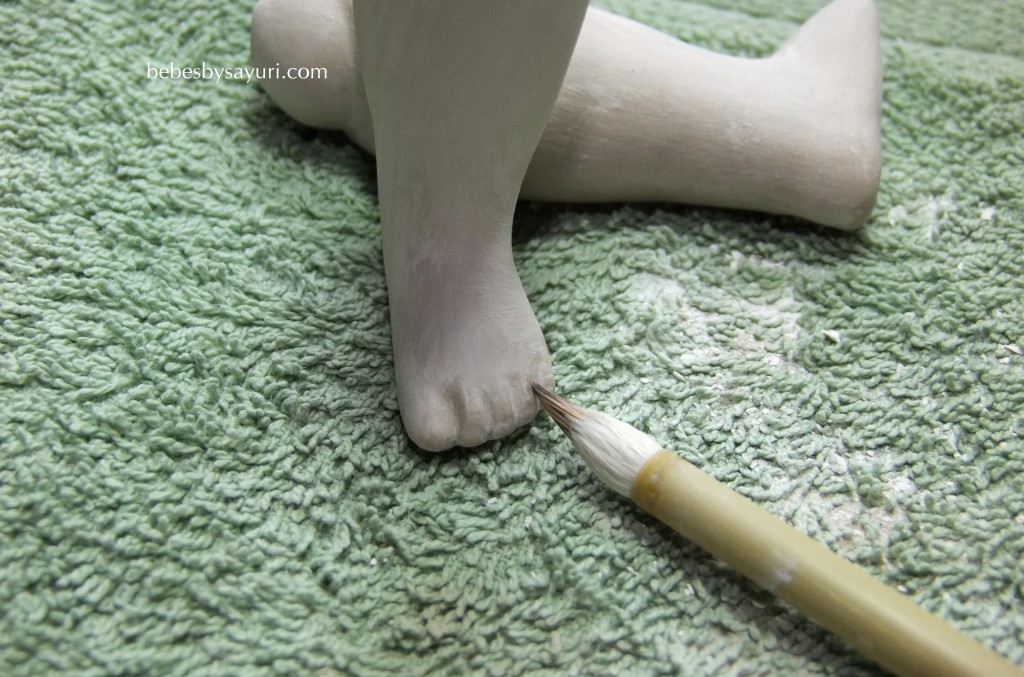
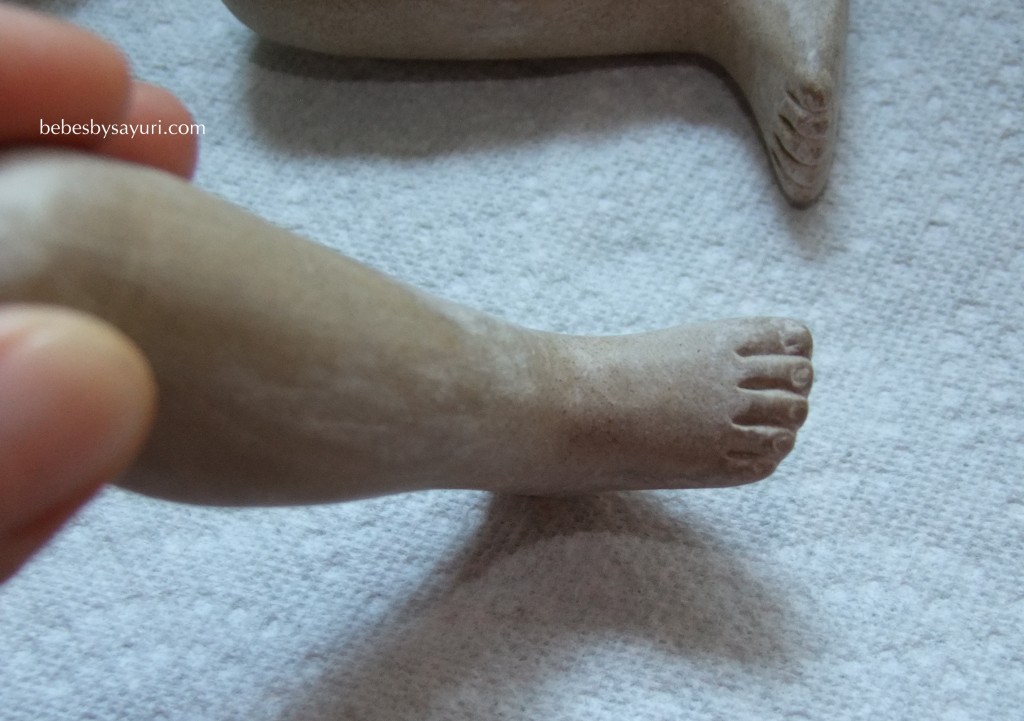
Carving lags closer to Bru leg shape when clay became hard like soap.Use scalpel and wet brush to shape toes and toe nails.

型取りした粘土が石鹸くらいの固さになったら、スカルペルで足首やふくらはぎを削ってBruらしい下肢にしていきます。濡らした筆とスカルペルで足の指と爪を形作っていきます。

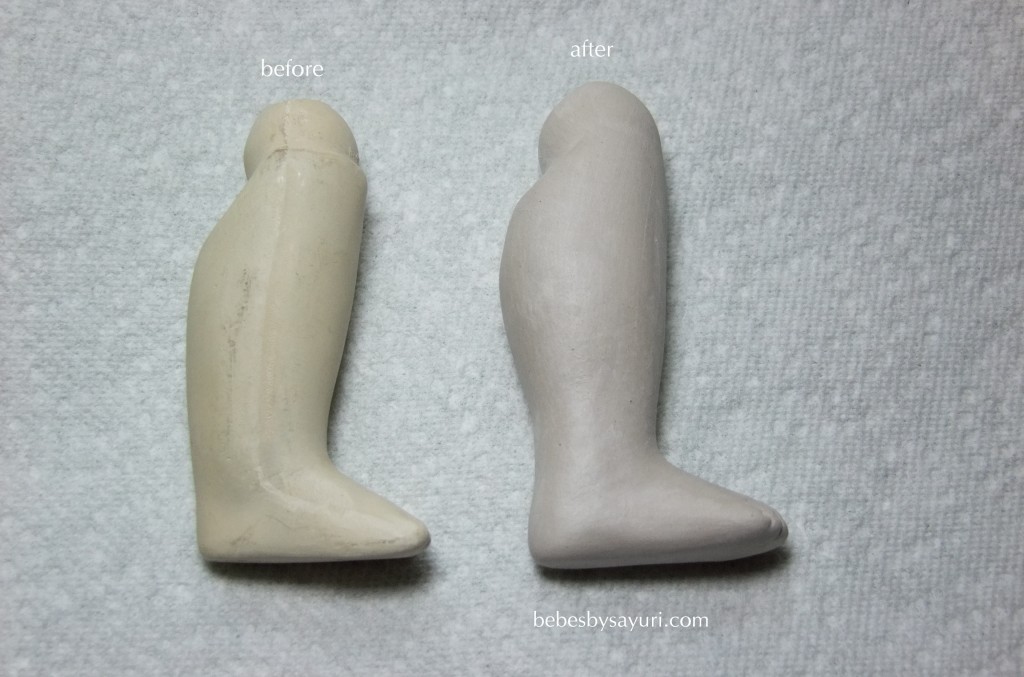
Left is the original leg shape formed by mold and right is the same leg after I modified because Bru legs usually have much skinnier ankles.

画面左が型抜きしたままの下肢。右側が同じ下肢をBru用に削ったもの。Bruの下肢は足首が他のフレンチドールに比べて引き締まっています。

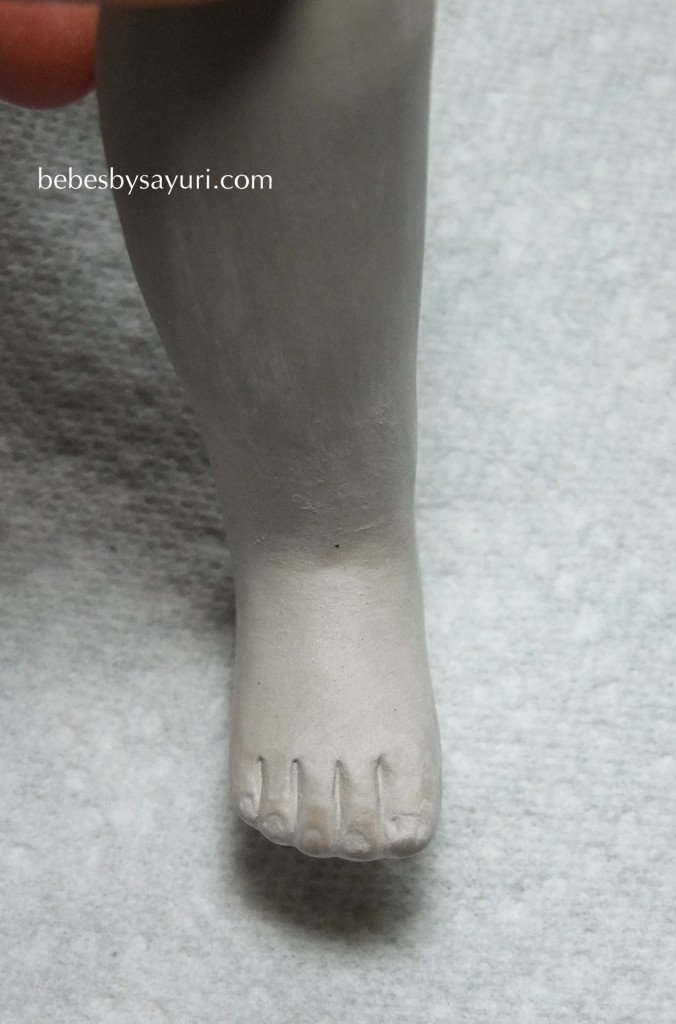
I carved more detail on toes just like Bru feet would be.               Bruのつま先はとても繊細に出来ているので、もっとデイテールが出るよう削りなおしました。

After clay was cured in the oven …                        オーブンで焼いた後はこんな感じです。

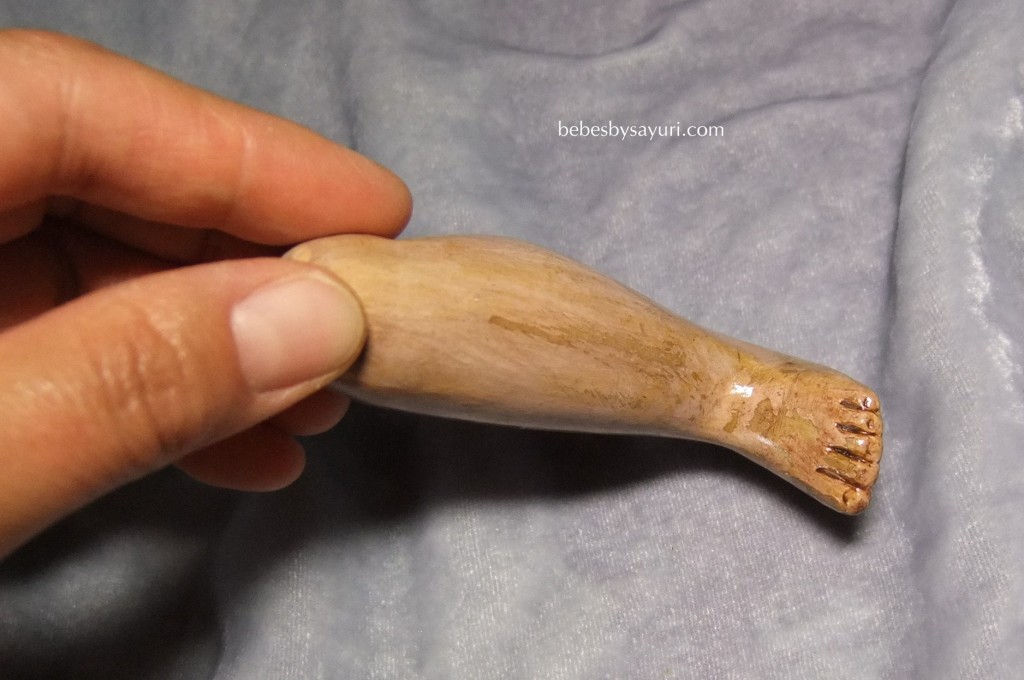
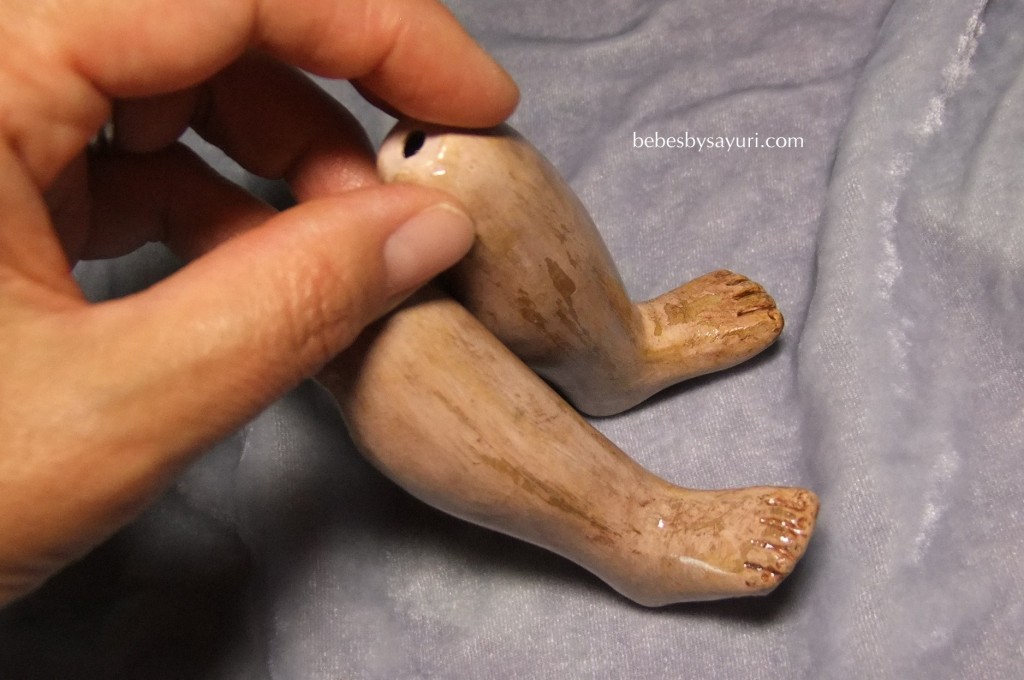
I gave antique finish to give vintage look.

何回か色を重ね塗りして一部ペイントをはがし、ヴィンテージの風合いを出しました。

My next project

I am thinking to make 14 inch Bru Jne 4 next by using this head. I received many requests to make little AT doll but I am not quite ready yet. Meanwhile I will work on this doll as my next project.

次の作品は、この14インチBruJne4ヘッドを使って完成品を作ろうかと考えています。先日お披露目した小さいATを作って欲しいというリクエストをたくさんいただきましたが、まだ準備段階なので、その間にこの娘を完成させたいと思います。